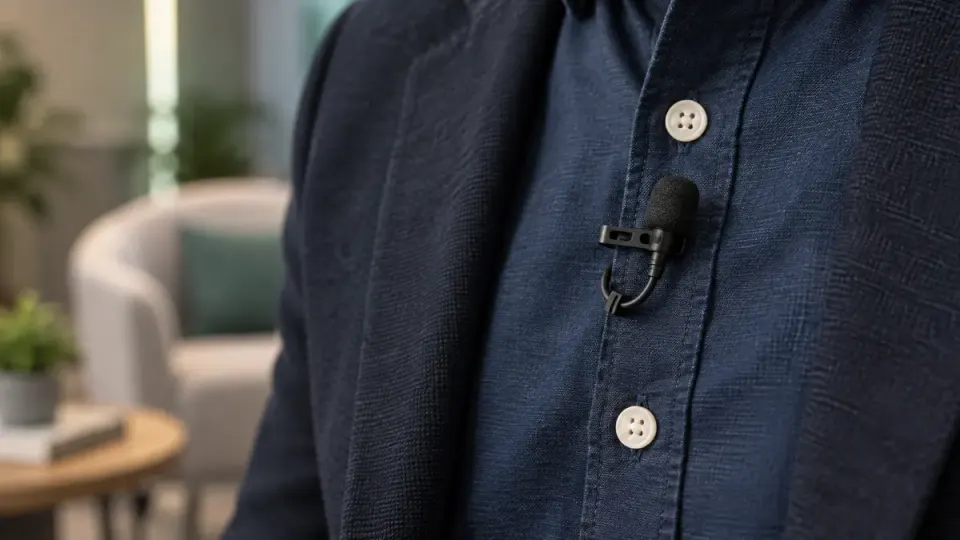
To reduce clothing rustle in lavalier audio, first check whether the unwanted sound sits between words or overlaps speech. Preserve the recording, look for a cleaner microphone track or another take, and try a restrained local edit for isolated noise in pauses. When cloth noise covers a word, dedicated repair may help, but it can also alter the voice; judge the complete sentence rather than a quieter waveform. General denoising is not a guaranteed fabric-noise fix. For the next take, test microphone and cable contact while the person performs their actual movements. Keep picture timing and clearly document any words that remain obscured.
Understand the contact problem before processing the file
A lavalier can sound acceptable while a person sits still and become distracting as a collar, jacket or cable moves. That pattern is different from a constant room hiss. The noise may coincide with gestures, a head turn or a change of posture rather than continue at the same level throughout the recording.
First distinguish contact from airflow, mouth clicks and an electrical fault. Listen to the source and, if you have picture, compare noisy moments with visible movements. A matching gesture is a useful lead, not proof of which part touched the microphone. Do not label every low thump as fabric contact or every crackle as a failed cable.
This guide is written by the NoiseVanish Editorial Team using official references checked on October 14, 2026. It is a document-based repair and capture decision framework, not a benchmark or a completed test of your microphone. NoiseVanish has a commercial interest in recorded-speech cleanup. We do not claim that its steady-background processing replaces dedicated clothing-rustle repair.
| Observation | First check | Safer initial action |
|---|---|---|
| A brief scrape in a pause | Where the preceding word finishes and the next one starts | Try a local level edit without changing duration |
| A scrape across an important word | Alternate microphones, takes or an authorized pickup | Compare another source before processing |
| Repeated noise when the person turns | Garment and cable contact during that movement | Reproduce and correct the mounting for the next take |
| Continuous hiss independent of movement | Background rather than individual contact events | Assess steady-noise reduction separately |
| Sharp tiny clicks without garment motion | Mouth sounds or edit boundaries | Use the separate click-diagnosis workflow |
For that last branch, see how to repair mouth clicks. Clothing rustle may occupy a longer interval or overlap a phrase, so a tool intended for isolated clicks should not be assumed to solve it.
Preserve the source and inspect your alternatives
Duplicate the recording or save a new project version before making changes. Retain the original microphone tracks if the recorder or camera captured more than one. A finished stereo mix is not the same as independent microphone sources; check what you actually possess rather than assuming the left and right channels each belong to one person.
Listen to the unprocessed alternatives at comparable levels. A boom, camera reference or second lavalier might contain clearer words, but it might also have a different room sound or be affected by the same clothing. A backup is useful only after it has been heard. Keep a note of which track and passage you compare so it is possible to retrace the decision.
Choose a passage that contains ordinary speech, a pause and the worst representative scrape. Mark an essential word inside the noisy section. That word becomes an acceptance check: if a repair makes it harder to understand, a reduction in the noise alone is not a successful result.
If an alternate source is usable, align it with the picture and assess the transition into and out of the replacement. Do not compensate for mismatched timing by silently changing the interview's meaning. Retain the speaker's actual statement and confirm that any pickup or alternate take is appropriate for the editorial context.
Repair a pause differently from a word
An isolated scrape in a clear pause may allow a simple local edit. Volume automation changes level over time without requiring removal of the time interval. Audacity's official Envelope Tool guide describes using control points for smooth level changes. Equivalent controls in another editor may use a different name; confirm the behavior in your installed version.
Work through a short passage rather than applying one setting across the entire recording:
1. Listen to the whole sentence and find the unwanted contact event. 2. Place the edit boundaries after the previous word ends and before the next word starts. 3. Reduce the event modestly and shape the transition back to the surrounding level. 4. Listen from before the edit through the next phrase, including the room sound. 5. Compare with bypass and keep only a change that improves the complete passage. 6. Confirm that the clip has not moved or shortened, especially when it accompanies video.
If the pause develops an obvious dead gap, less attenuation may be more convincing than silence. Matching room tone can sometimes fill an interval, but its duration and both joins need review. Use appropriate ambience from the same scene; avoid repeating a distinctive sound or inserting a noticeably different room.
Do not apply this procedure unchanged when the scrape covers speech. Lowering a section lowers the voice within that section too. A short word ending can be easy to miss when the timeline is tightly zoomed, so always judge the phrase with enough context to hear it.
When specialized rustle repair is worth assessing
Dedicated restoration addresses a different task from turning a pause down. iZotope's historical RX 6 De-rustle documentation describes processing noise generated by a lavalier brushing clothing. This older manual illustrates the task and its tradeoffs; it is not a reference for current purchase eligibility, menus or edition availability. Check the official documentation for your installed version before choosing a tool. We have not run a comparative listening test or verified a particular preset for this article.
If you already have access to a suitable repair tool, assess a short duplicate containing both the interference and the word you want to keep. Start from a conservative treatment and compare the entire phrase at similar playback levels. Listen for changes in articulation, voice texture and surrounding ambience, not only whether the scratch becomes quieter.
Keep a version with the original and another with the proposed repair. If stronger processing reduces noise but weakens an essential syllable, try a gentler result or another source. A little remaining rustle can be less harmful than an uncertain word. There is no useful universal percentage of recovery for all garments, microphones and movements.
Before deciding to use a new application, confirm its current version, module availability, input/output path and license requirements from its official documentation. This article does not rank subscriptions, claim a price advantage or promise that every edition includes the same controls. Do not purchase a tool solely because an untested tutorial names it.
Why a steady-noise profile is not the default cure
Audacity's official Noise Reduction documentation distinguishes constant background from irregular disturbances and warns about unwanted audio damage when noise varies or overlaps the wanted signal. A particular scrape is not automatically representative of later fabric contact. Taking that event as a whole-track profile may therefore treat the recording in ways you did not intend.
Separate the two listening decisions. First decide how to address the contact events. Then assess whether a stable fan, hiss or similar background still needs attention. If you try background cleanup, preserve the local edits and compare the exported result; effects can interact with automation, and the manual for your installed software should be consulted.
Likewise, a gate cannot reliably identify clothing simply from its volume. An event underneath a spoken word may occur while the gate is open. Raising a threshold to chase it may harm soft speech elsewhere. The broader noise reduction versus noise gate guide explains that choice without presenting either approach as universal repair.
If processing adds a metallic or watery character, return to an earlier version. Use the processing-artifact diagnosis guide to separate the new damage from the original defect instead of stacking more effects onto a deteriorating result.
Prevent contact during the next recording
When another take is possible, improving the capture may be more useful than more post-processing. RØDE's official Lavalier instruction manual advises balancing proximity to the source with avoiding clothing rustle, and testing different placements. Its fitting and cabling instructions are specific to that microphone; follow the correct manual for your own equipment rather than assuming every clip mounts identically.
Use the actual wardrobe and required movements for a short listening test. Ask the person to turn, look down, sit or gesture as they will in the scene. Check that the microphone opening remains unobstructed and that nearby fabric or accessories do not brush it during those actions. A placement that works only while someone freezes is not an adequate test for a moving presentation.
Inspect the cable path as well as the capsule. Check whether motion pulls on the microphone or brings the cable into contact with a garment. Use suitable mounting accessories according to their instructions and the wearer's consent. Do not prescribe adhesive on skin, obstruct the grille or improvise a mount that damages clothing simply because a photograph looks tidy.
Airflow protection and contact prevention are related capture decisions, but they are not interchangeable. A windshield does not establish that a fabric-contact problem has been solved. Repeat the movement test after any change and listen to the recording rather than relying on the microphone's appearance.
Keep the repair aligned with the video
A repaired soundtrack must still fit the picture edit. Keep its start position and the original time intervals unless you intentionally change both picture and sound. A ripple deletion in a quiet gap can shift everything after it, so confirm the editor's behavior before using it for noise removal.
Review the exported segment at the beginning, middle and end of the affected passage. Check lip synchronization or the demonstrated action, the correct microphone track and the boundary of each replacement. Listen to the actual output file: the timeline monitor may not reveal the wrong export selection or an effect that reset a level edit.
Keep a short handoff note with the source track, affected time ranges, chosen repair, alternate material used and any words still obscured. This helps the next editor distinguish an intentional remaining sound from an overlooked defect. It also prevents an uncertain word from being treated as verified simply because the file carries a “cleaned” name.
Know when to stop and where NoiseVanish fits
Stop escalating treatment when the sentence becomes less intelligible, the voice changes conspicuously or the transition is more distracting than the remaining scrape. If no available source preserves the words, document the limitation and consider an appropriate pickup or rerecording. Do not guess missing speech or present generated reconstruction as the original interview.
NoiseVanish is a candidate for steady background noise around intact recorded speech. It does not promise dedicated De-rustle processing or recovery of every garment scrape. Keyboard sounds, background voices, overlapped audio and severe echo remain more difficult cases. Use a representative recorded-video preview only when the residual background matches that task; use the audio cleanup path if you already have a separate track.
FAQ
Can clothing rustle always be removed after recording?
No. The result depends on the interference, overlap and available source material. A scrape between phrases offers different options from one hiding a consonant. Prefer an intelligible sentence with some remaining noise to a quieter result that changes the words.
Should I apply noise reduction to the whole lavalier recording?
Not automatically. Diagnose the moving contact events first. Stable background and changing fabric noise are different problems. A short, reversible test is safer than assuming one captured scrape is a suitable profile for every moment of the interview.
Will deleting a noisy pause affect video synchronization?
It can if the operation removes time or moves later clips. A level edit serves a different purpose. Preserve intervals for a fixed picture edit and check the exported soundtrack's alignment rather than assuming the timeline remained unchanged.
Does a cleaner backup microphone automatically solve the problem?
No. Check that the wanted words are present, align the source and review its room sound and transitions. A backup may contain its own noise or a different perspective. Use only appropriate material that preserves the speaker's real statement.
Is NoiseVanish a replacement for a dedicated rustle-repair tool?
Do not assume so. Its suitable job is steady-background reduction around recorded speech. Evaluate cloth-contact repair, alternate tracks and capture changes separately. A preview can inform the background decision but does not prove missing dialogue has been restored.
Sources and review scope
The RØDE manual, historical RX 6 De-rustle documentation and two Audacity manuals above were checked on October 14, 2026. The RX reference is explicitly historical, not a current-version buying guide. Manufacturer statements establish intended use or documented operation, not an independent efficacy test. The event-triage, context listening and handoff checklist are this team's proposed reproducible method; no client sample, before-and-after measurement or universal recovery rate is claimed.