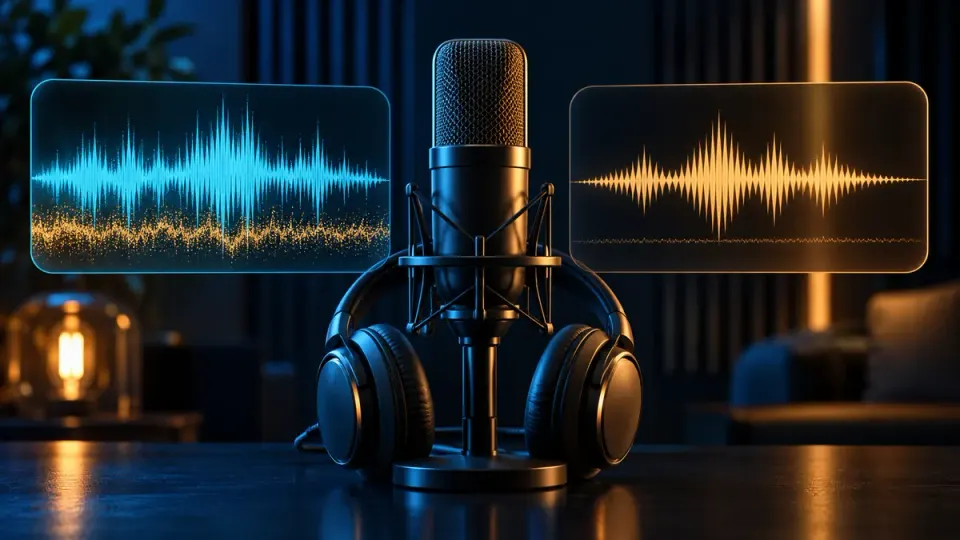
Audio normalization changes a recording's overall level; noise reduction tries to reduce unwanted sound selectively. If normalization makes speech louder, it usually makes the existing background noise louder too. That does not necessarily mean it created new noise. For quiet spoken video, first identify whether the problem is low playback level, poor speech-to-noise balance, or both. Preserve the original, compare processing at similar listening levels, and use restrained cleanup only when the noise is suitable. There is no universal rule that normalization must always come before or after denoising. The right workflow depends on your source, processing method and delivery requirements.
Two different jobs hiding behind “make it clearer”
A tutorial can be difficult to hear because its entire soundtrack is quiet. Another tutorial can have plenty of level but a fan competing with every sentence. A third can have both problems. Those recordings need different decisions, even if their owners describe all three as bad audio.
Level adjustment answers how loud the material should be. Noise reduction answers whether some unwanted sound can be reduced without losing wanted speech. Neither operation automatically repairs microphone distance, overlapping speakers or missing information. Before choosing a button, write a specific goal such as “raise the voice to a usable listening level while keeping the air-conditioning bed unobtrusive.” That sentence gives you something to judge beyond the size of the waveform.
This guide is written by the NoiseVanish Editorial Team. It compares processing concepts using official documentation checked on October 8, 2026. It is not an independent product benchmark or a report of measured cleanup results. The examples below are hypothetical explanations, and the listening checklist is a procedure you can apply to your own recording.
Why normalization makes the background easier to hear
Imagine a recording where speech is quiet and a soft room hiss is quieter still. Turning the whole recording up raises both. The listener may notice the hiss for the first time because it now sits at an audible level, not because the gain operation generated it.
For a simple uniform gain change, the relationship between speech and noise remains the same, provided you avoid clipping or other nonlinear processing. A hypothetical six-decibel increase raises both components by six decibels. That example illustrates gain arithmetic; it is not a claim about a NoiseVanish output or a recommended setting.
Audacity's current Normalize documentation describes one gain adjustment based on the selected audio's highest peak. The effect also offers DC-offset correction and a separate-channel option. Those additional controls are reasons to inspect what you enabled rather than treating every operation named Normalize as identical.
If the noise changes shape, pumps between words or appears only after export, look beyond normalization. A compressor, automatic gain control, limiter, aggressive denoiser or playback enhancement may also be active. Compare intermediate files before assigning the problem to the last button you clicked.
Peak normalization, loudness normalization and cleanup
| Operation | Main question it answers | What it does not establish |
|---|---|---|
| Peak normalization | Where should the largest peak land? | That the speech is clean or consistently easy to hear |
| Loudness normalization | What overall measured loudness should this selection reach? | That background noise was removed or all speakers are balanced |
| Noise reduction | Can unwanted noise be reduced while preserving the wanted sound? | That the result meets a platform's delivery loudness specification |
| Manual clip-level adjustment | Does this sentence or section need a different level? | That noise beneath those words has been separated |
Audacity's Loudness Normalisation documentation distinguishes measured loudness from peak level. This matters when a loud click determines the peak but most of the speech remains soft. Bringing that click to a peak target is not the same decision as bringing the program to a loudness target.
Use the current delivery specification for your destination rather than copying a number from an unrelated broadcast, audiobook or social-video tutorial. A tool's default is not a universal publishing rule. You may also need to check peaks after changing overall loudness; a satisfactory average level does not mean every transient is safe.
Diagnose the recording before processing it
Start with a normal sentence, a quiet sentence and a short pause. Add the hardest passage: perhaps the presenter turns away, the fan changes speed or a keyboard interrupts a word. These sections expose different failures that a clean pause alone can hide.
Listen to the original at a comfortable monitoring level. If the words become easy to understand and the room sound is acceptable, the main issue may be delivery level. You might not need a denoiser at all. If louder monitoring makes the fan equally intrusive, level adjustment alone will not improve the balance.
Check whether the unwanted sound is reasonably stable. Hiss, hum and a steady fan are different from clothing rustle, key presses, distant conversations or strong reflections. Our video hiss guide owns the specific steady-hiss cleanup task. This article owns the choice between level adjustment and noise processing, not a second generic hiss-removal tutorial.
Also check for damaged capture. Distortion on loud syllables, missing words or a microphone rubbing against clothing can be more important than the quiet noise floor. Keep those limitations visible when judging whether a cleaner-sounding version is actually more useful.
A practical workflow for quiet spoken video
1. Preserve the original and note the active processing
Keep an untouched source file and a separate working version. Record whether the camera, meeting software, recording application or editor already applied automatic level control or suppression. You do not need to know every internal algorithm, but an active processing chain can explain why the noise rises and falls between sentences.
Avoid repeatedly exporting compressed intermediate copies when a higher-quality source is available. Keep the selected timing consistent so that a later audio replacement does not drift against the picture. Name the versions by what changed, not by subjective labels such as perfect or studio quality.
2. Choose the first operation by the actual problem
If the recording is simply quiet but otherwise acceptable, try a level adjustment first and listen again. If persistent noise masks speech at a normal listening level, audition suitable noise reduction. If both are present, plan to check each separately rather than expecting one operation to solve everything.
There is no compulsory order that applies to every processor. Audacity's legacy Noise Reduction manual explicitly allows amplification or normalization before or after its noise reduction. This is documentation for that workflow, not evidence that every AI service behaves identically. Follow the method your tool documents and verify the result.
3. Use a representative noise profile when required
A profile-based method needs an appropriate noise-only section from the recording. Do not teach it a quiet word, breath or desired background sound and then expect that material to survive unchanged. If there is no suitable isolated noise, acknowledge that limitation rather than inventing a profile from another room.
The current Audacity Noise Reduction manual explains the profile stage and the noise-only output used to inspect what would be removed. Its workflow is not a description of NoiseVanish's controls. Different processing tools may not expose a profile or a residue preview.
4. Compare at similar listening levels
A louder version can feel more impressive even when it retains the same noise or damages consonants. Match the normal sentence approximately by perceived listening level before comparing original and processed versions. Keep the same headphones or speakers and avoid changing the monitoring volume halfway through a decision.
Listen for word endings, softer syllables, breaths and the transitions into pauses. Reject a setting that hides noise by making the speaker watery, thin or metallic. Some residual room sound may be preferable to a heavily altered voice. Use our metallic audio troubleshooting guide when the main problem is processing damage.
5. Set the final level after choosing the acceptable version
Once the chosen speech version works, adjust the finished edit to its intended delivery requirement. Listen again after music, transitions and any other final processing are in place. A solo voice track can sound acceptable while still being masked by the background music in the completed video.
Inspect the exported file, not only the editor preview. Confirm that no new clipping or obvious level jump appeared and that the right soundtrack was exported. This final check is a verification step, not a promise that normalization guarantees a clean or compliant file.
How to tell louder noise from newly introduced damage
Return to the same pause in the original. Increase only your monitoring level temporarily. If the same hiss becomes obvious, it was already in the capture. Restore your listening level afterward so that subsequent comparisons remain fair.
Then compare a normal sentence at matched loudness. If the noise-to-speech balance is essentially unchanged, the gain change explains the greater audibility. If the background swells around words, compare versions with compression and automatic level processing bypassed. If metallic tones appear only in the cleaned copy, reducing the noise more aggressively is unlikely to be a useful first response.
Do not judge success entirely by a meter showing a quieter pause. A gate can mute pauses without removing noise beneath speech. Our noise reduction versus noise gate guide covers that separate choice. Here the key question is whether wanted speech remains understandable at the level at which people will actually hear it.
Where NoiseVanish fits—and where it does not
NoiseVanish is relevant when steady background noise is a significant problem in an existing spoken file. You can review the current video noise-removal workflow and audition an appropriate source. This is a cleanup option, not a claim that NoiseVanish supplies peak normalization, loudness mastering, a realtime microphone plugin or every manual control described in Audacity.
Keyboard impacts, background voices, overlapping audio and severe room echo may remain difficult. Reducing a fan does not recover a syllable covered by another speaker. Strong music or dense sound effects can also conflict with the wanted voice. Do not treat quieter output as evidence that all those components were correctly separated.
If a new recording is possible, improving microphone placement and reducing the noise at capture can be more reliable than repeatedly processing a compromised source. For an irreplaceable recording, accept a restrained result when that preserves more information. The goal is useful spoken video, not an unrealistically silent waveform.
Frequently asked questions
Does normalization remove background noise?
No. A normal uniform gain adjustment changes the level of existing speech and noise together. It can make a quiet recording easier to hear, but it does not selectively remove the fan or hiss. Use an appropriate cleanup method only when that noise actually needs treatment.
Should I normalize before or after noise reduction?
There is no universal answer. Use your processor's documented workflow, retain the original and compare results fairly. A profile-based method needs a representative profile; an automatic service may respond differently to its input. After choosing a useful cleanup result, check the final program's delivery level and peaks separately.
Why is my voice still quiet after peak normalization?
A single loud transient can determine the highest peak while the rest of the speech remains soft. Peak level and measured loudness are different quantities. Inspect the recording rather than increasing everything until it clips, and consider whether a local edit or delivery-loudness adjustment is the actual task.
Can I normalize my way out of overlapping voices?
No. Turning the whole selection up raises the competing voice too. Separating voices that occur at the same time is a different and limited task. Keep the original available and avoid promising that normalization or ordinary background-noise cleanup will isolate the main speaker reliably.
A simple stopping rule
Keep the version that makes the words easier to follow at the intended listening level without distracting processing damage. If level adjustment alone meets that goal, stop there. If restrained reduction helps with stable noise, keep it and finish the level separately. If every stronger pass loses speech, preserve the least-damaged version and state the source limitation instead of chasing silence.